Speech Prompter Installation: Setup Guide and User Manual
In this tutorial We’ll walk you through the complete VAC Speech Prompter Installation process.
Table of Contents
Items in the Package
When you purchase the VAC Speech Prompter, you will get the following items in the package.
2 Prompter Base Units (with pre-integrated 19″ monitors)
2 Height Adjustable Prompter Stands with Glass Holders
2 Beam Splitting Mirrors
1 HDMI Splitter
1 Wireless Remote Control
2 Power Cables for Monitors
3 HDMI Cables (5m, 3m, 1.8m)
Speech Prompter’s Components
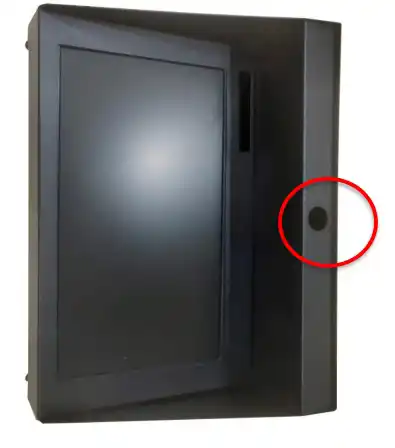
Monitor Base Unit
It is a metallic housing case designed to hold a 19″ monitor
It provides protection for the monitor against physical damage.
It maintains the visibility and contrast of the scrolling script.
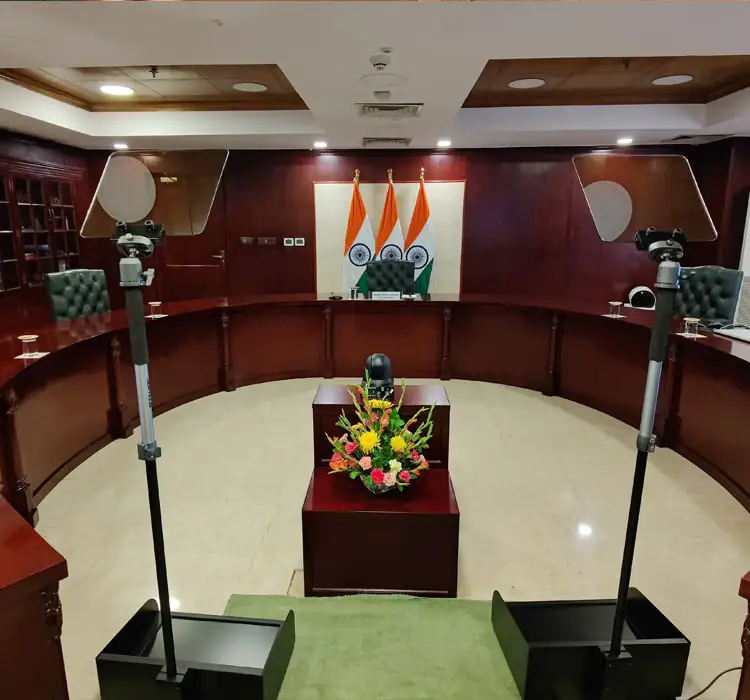
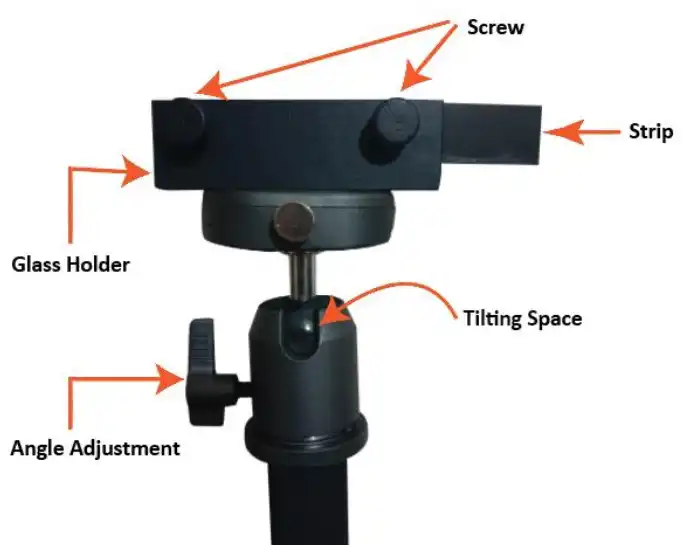
Height Adjustable Stand
The speech prompter comes with a height-adjustable stand that holds a beam-splitting mirror. It features a mechanism to adjust the angle of the glass for the user’s convenience.
Beam Splitting Mirror
Professional 60:40 Splitting Mirror
User reads the content on the mirror, but audience can not see it
The glass is transparent, so it does not block the speaker’s face.
Speech Prompter Installation
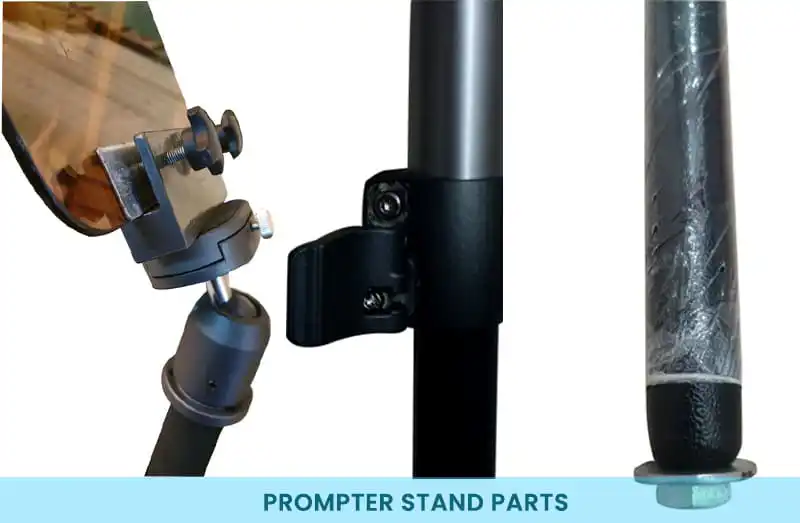
Prompter Rod Installation
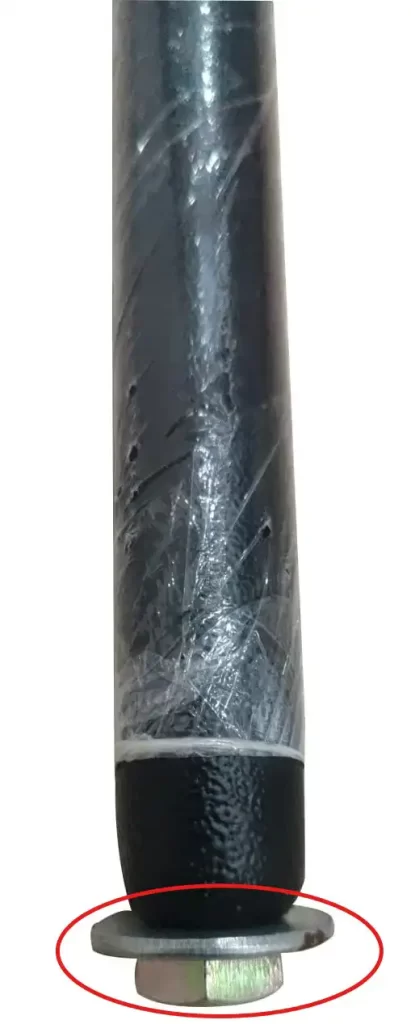
Step 1: Remove the Bolt from the lower end of the stand as shown in Image 1A.
(Image 1A)
(Image 1B)
Step 2: Insert the rod into the monitor’s base hole, as shown in Image 1B. Then, tighten the bolt from the bottom side.
Beam Splitting Mirror Installation
The beam-splitting mirror has a special coating on one side to improve both reflection and transparency. When inspecting the mirror, you will notice that the reflection of text appears clear on one side and blurred on the other.
Before placing the mirror into the glass holder, check which side is coated. To do this, place a sheet of paper with large text under the mirror. The side that shows a clear reflection is the coated side.
The coated (clear-reflecting) side should face the monitor display.
Place the strip inside the glass holder before inserting the mirror.
Insert the mirror so that the strip is on the screw side. This prevents direct contact between the screws and the mirror, protecting it from scratches.
Tighten the screws carefully.
Ensure that the tilting space faces the monitor. This allows for easy adjustment of the mirror angle. Make sure of this orientation when inserting the rod.
Angle Adjustment: allows you to tilt the mirror toward the monitor. This ensures that the full display is visible in the mirror from the speaker’s standing position at the podium.
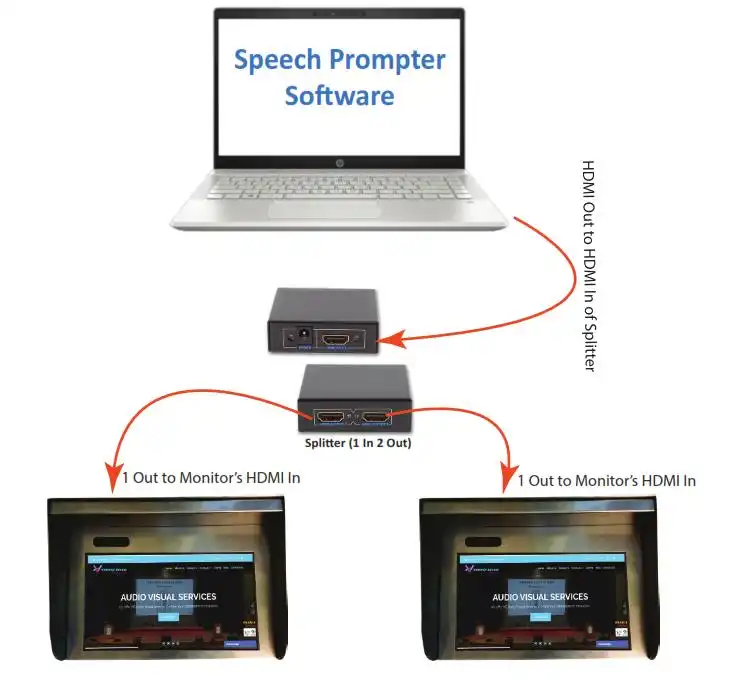
Speech Prompter Connection Diagram
Connect the 5m HDMI cable from the laptop (with the prompter software installed) to the HDMI IN port on the splitter.
The splitter has two HDMI OUT ports. Connect them to the two monitors using the available 3m and 1.5m HDMI cables.
Place the splitter near the monitor that uses the 1.5m HDMI cable.