This Digital Podium Installation Guide will walk you step by step through the process of installing and configuring your digital podium for the first time after purchase.
Whether you are installing it in a classroom, conference room or auditorium, this digital podium installation guide ensures simple, hassle-free setup and seamless integration of all equipment.
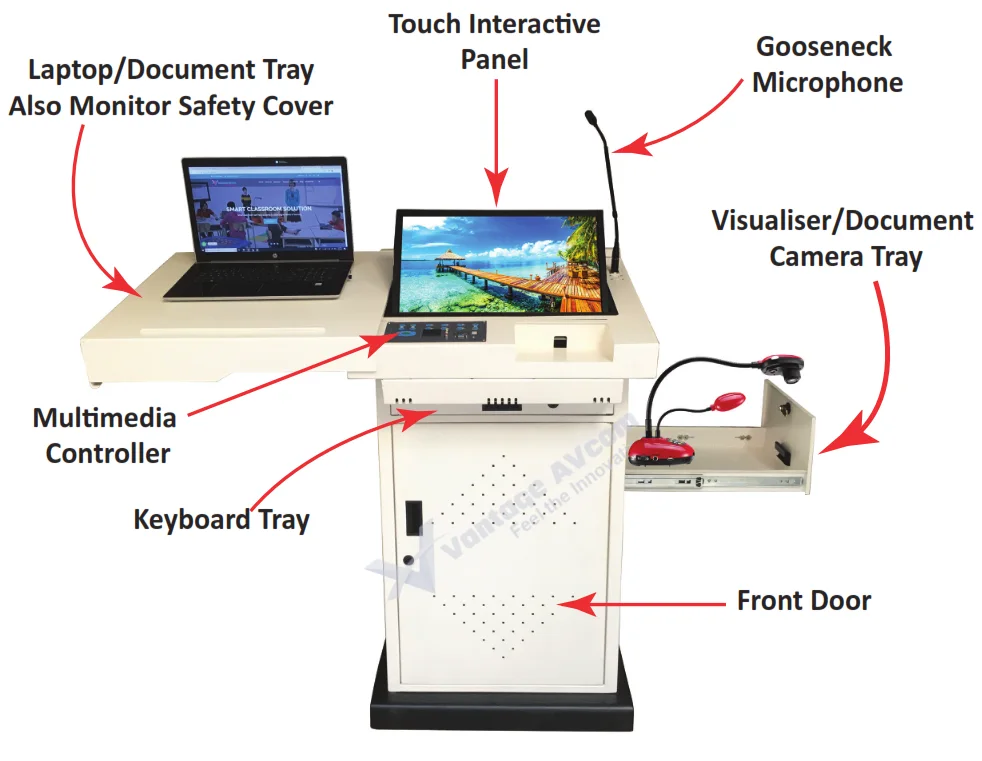
A digital podium brings everything you need for a classroom or conference room into one unit. It combines a computer, touch monitor, audio system (amplifier, speakers, microphones), document camera, and multiple connectivity ports.
This guide covers:
Table of Contents
Items in the Package
Touch Interactive Monitor
Computer System
Document Camera
Amplifier, Speakers
Gooseneck Microphones
Hand-held & Lapel Microphone (Optional)
Multimedia Controller
Installing the Touch Interactive Monitor in Digital Podium
For safety reasons, the touch monitor is shipped separately. You can easily install it by following the steps below:
Place the monitor into the monitor cabinet located at the top of the podium.
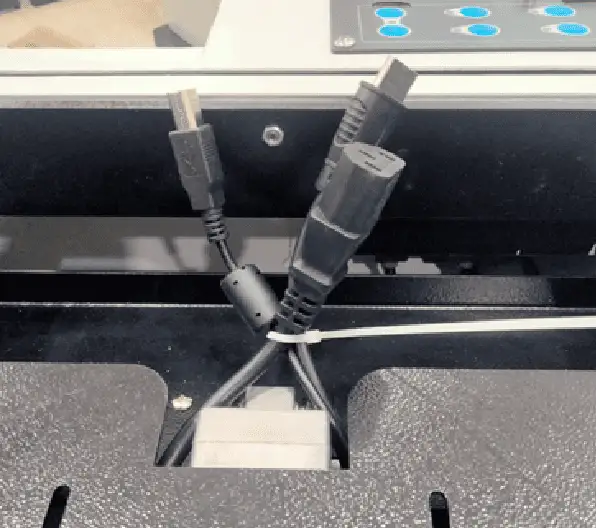
On the top, you will find three tied cables – Power Cable, USB Data Cable, and HDMI Cable (see image A).
Untie the cables and connect them to the monitor as shown in image B.
Image AImage B
Now, use the provided screws to securely fix the monitor to the cabinet.
Locate the screws on the backside of the monitor (see image C).
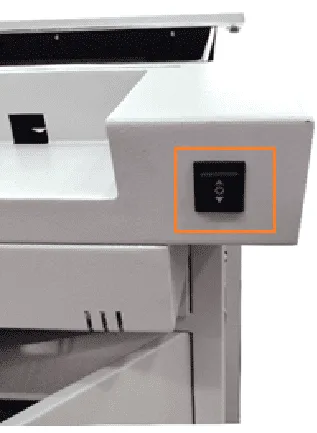
Using the Monitor Tilt Switch (see image D), lift the monitor cabinet to about 55°–60°. This will make it easier to tighten the screws from the backside.
Position the monitor in the cabinet so that the cabinet strip and the monitor screw holes are properly aligned. Tighten the screws to fix the monitor securely (see image E).
Note: Ensure the monitor is placed in such a way that it does not touch the cabinet frame while lifting with the motorized tilt.
Image CImage DImage E
Integration of Computer
Place the PC on the rack inside the podium.
Connect the power cable to the PC.
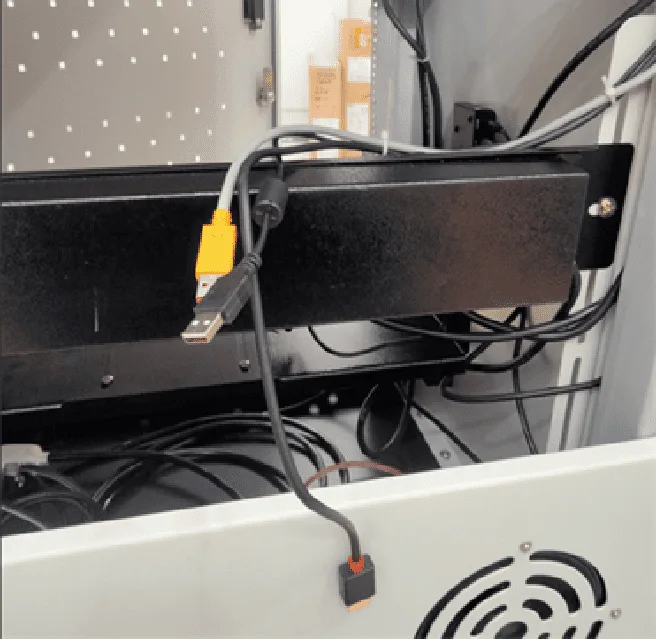
Open the Audience Side Service Door using the keys.
Locate the three tied cables (one HDMI and two USBs) as shown in Image (F), and connect them to the PC.
Connect the 3.5mm audio cable to the Audio Out port of the PC (you will find the cable inside the podium).
Connect the Keyboard and Mouse cables to the available USB Ports of the PC.
Image FImage G
Connection of Amplifier to Smart Podium
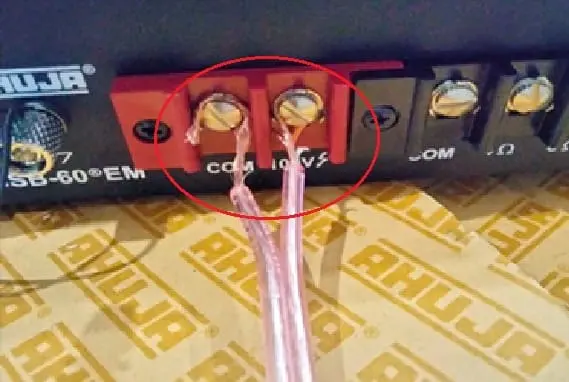
Find the speaker cable – you will find it at bottom rack of the podium. One end of this cable has a red line while other one is transparent as shown in the image (H)
Connect the cable end with the red line to the 100V Output of the amplifier.
Connect the transparent cable end to the COM port of the amplifier (see Image I).
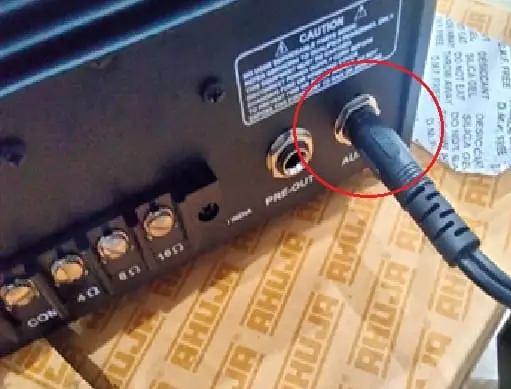
Connect the 6.5mm audio cable to the amplifier’s AUX port (see Image J).
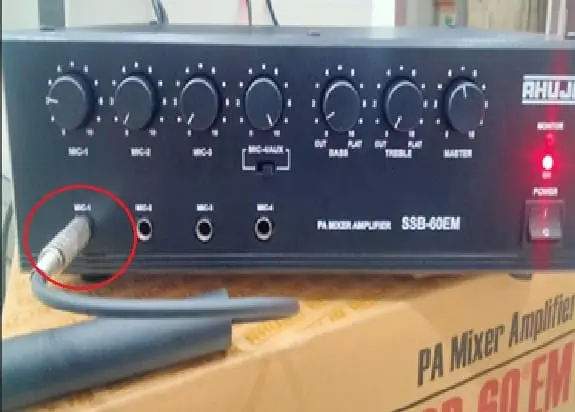
Connect the gooseneck microphone cable to the MIC1 port of the amplifier (see Image K).
Image HImage IImage JImage K
Powering the Digital Podium & Connecting Projector/Panel
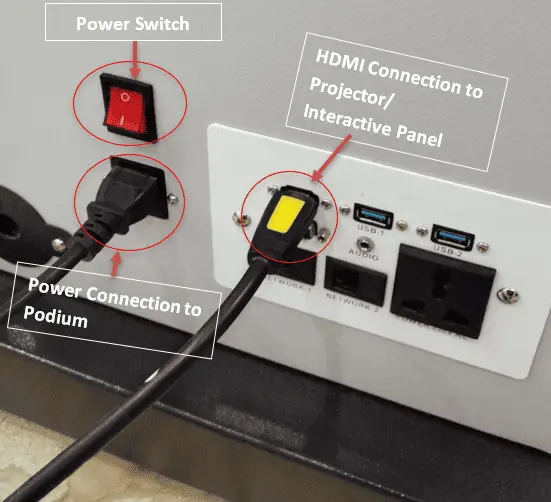
Power ON the Podium: Connect the power cable to the podium (see Image L) and switch on the power button.
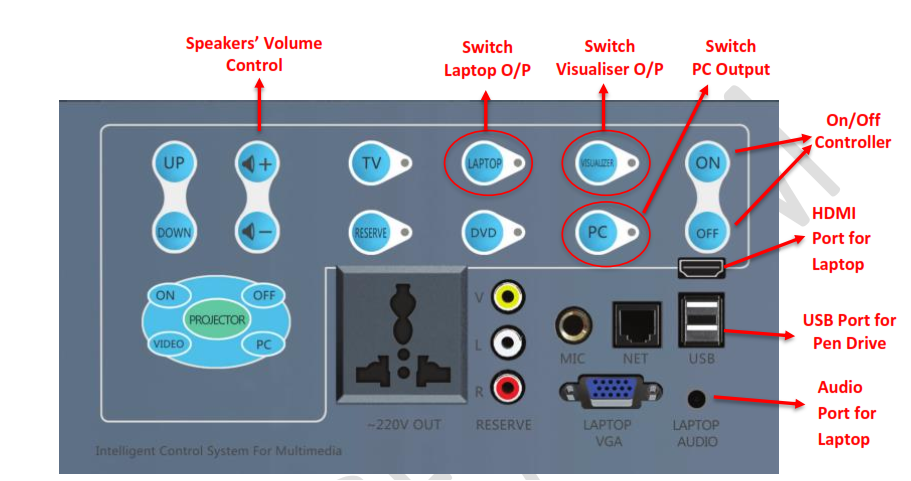
Power ON the Controller: Press the power ON button of touch pad to turn on the controller. See the Controller Image (M)
Power ON the PC – Press the Power ON button of PC.
Power ON the Document Camera (Optional) – Press the Power ON button of the Document Camera to turn on the camera.
Plug in the projector’s HDMI cable to the HDMI Port of Podium (Find on side bottom plate) as shown in image (L).
Laptop Connectivity: Place the laptop on the top sliding tray and connect it to the controller’s HDMI port using the HDMI cable provided in the package.